Filed under: Best Practices, Featured
Comments: 2
Using clones to run unit test
In NexJ Contact 7.1, we introduced the ability to run unit tests in parallel. The benefit of running unit tests with clones is that the entire suite of test cases can be run quicker. For example, a test suite that runs for an hour without clones, might run in under 20 minutes with 3 clones.
The following steps walk you through creating a system that runs unit tests with three clones:
- Generate and run the database schema tool for each of the three clones:
- Generate and run the database schema setup script using the unit test environment file. This is the default unit test setup, only one unit test can run at any given time.
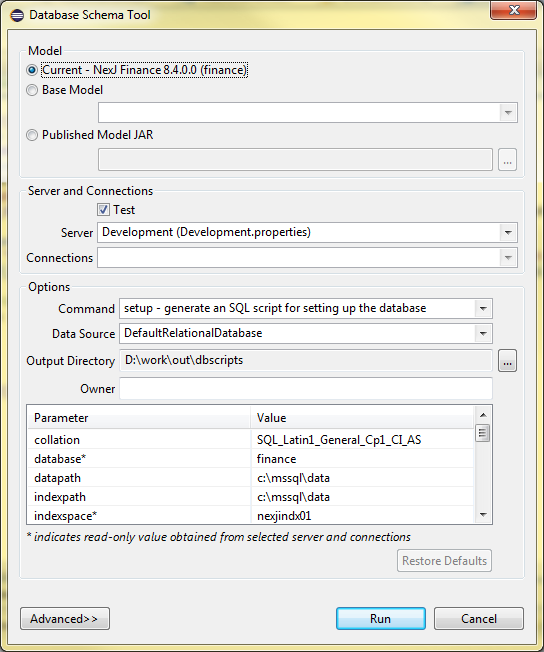
- Paste the following VM argument in the Databse Schema tool:
1-Dnexj.server.property.override.test.clone=1
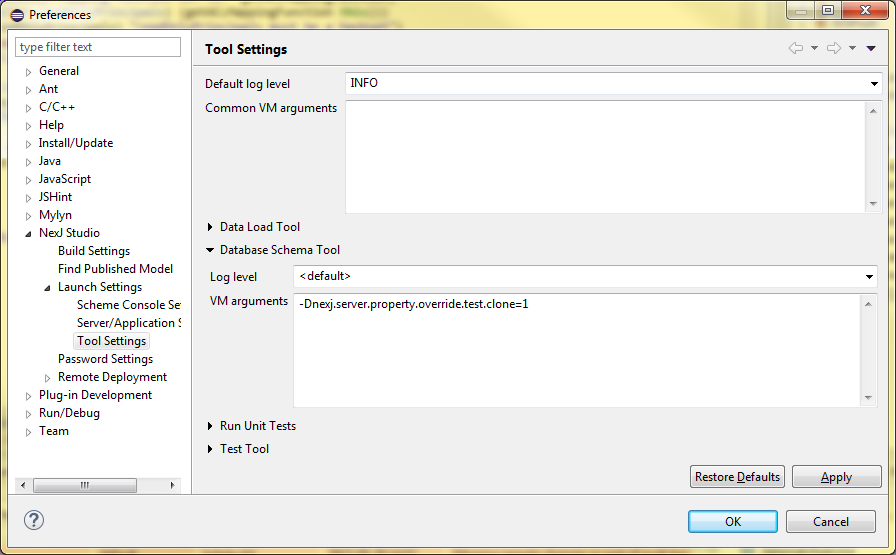
- Generate and run the database schema setup script again. This creates your second unit test database, which will be used by the first unit test player clone. This will allow two unit tests to be run in parallel.
- Change the VM argument value from 1 to 2
- Generate and run the database schema setup script again to create the third and final database and clone.
- Verify that the following databases exist: unittest, unittest1, unittest2
- Generate and run the database schema setup script using the unit test environment file. This is the default unit test setup, only one unit test can run at any given time.
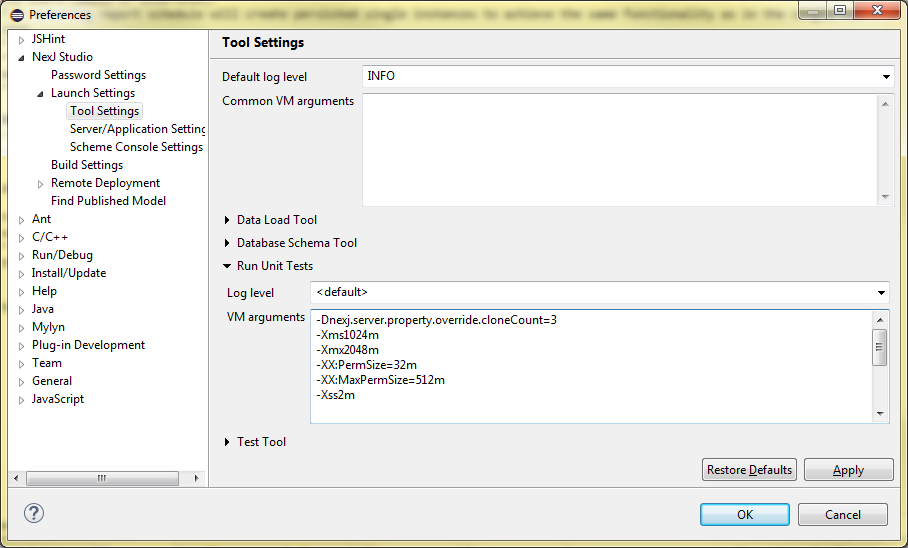
- In the Tool Settings window, paste the following VM argument into the Unit Test section:
1-Dnexj.server.property.override.cloneCount=3
Along with the optional arguments:
12345-Xms1024m-Xmx2048m-XX:PermSize=32m-XX:MaxPermSize=512m-Xss2m
These arguments modify the memory and usage limits while the unit tests are running. The optimal setting for these will also depend on the machine specifications and experimentation will be necessary to find the optimal setting.
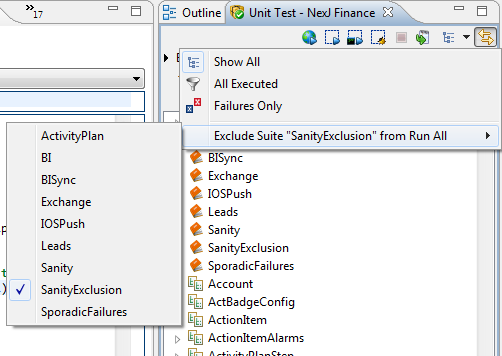
- Optionally, exclude the integration tests. This should only be done if they are running regularly somewhere else.
Note: the optimal number of clones will depend on the hardware being used. For an 8GB machine that has a JVM with a 2GB heap, we recommend 2 or 3. The optimal number is also likely one less than the number of CPU cores.
Interpreting the results
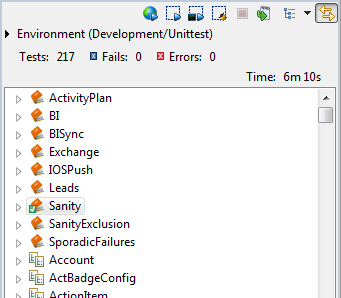
The UI displays the number of failures, errors and tests executed as well as the total execution time summed across all of the clones.
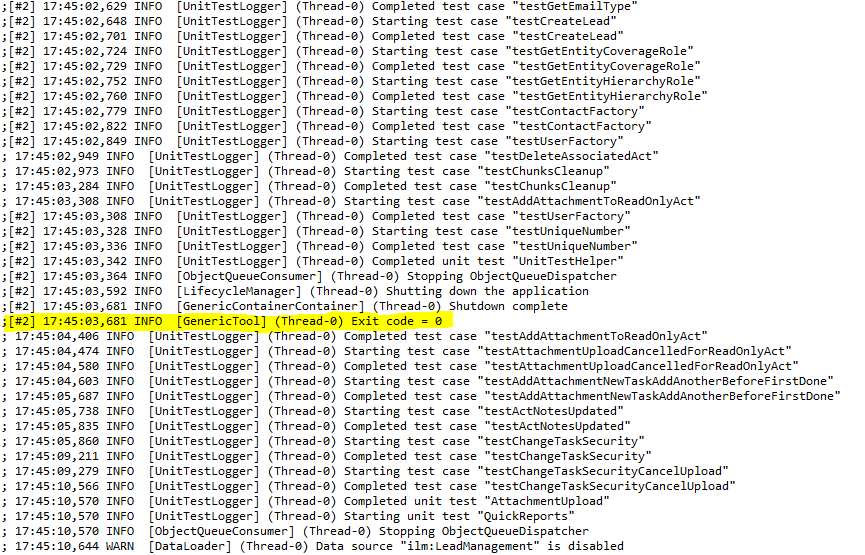
The console logs the activity of the unit tests by thread.

The [#1] indicates that the line was printed out by the thread using the unittest1 database, [#2] indicates that unittest2 was in use, and the absence of a line prefix indicates that the unittest database was being used.
It is important to watch all clones for passes as the last line of the console will only refer to the last clone to complete testing (that is, the clone that printed the line). For example, the screenshot below shows that the thread running on unittest2 passed without failures, but it could easily be hidden by the scroll caused by unittest1 and unittest threads still running.
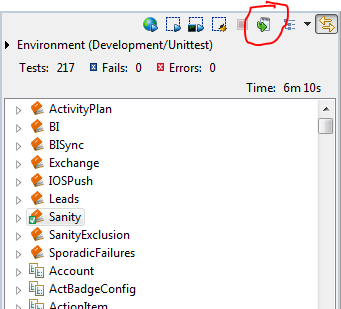
The unit test viewer and the xml results are helpful for globally viewing what has passed and failed. The XML will also hold the stacktrace of the failure. The XML file can be retrieved by clicking the export button.
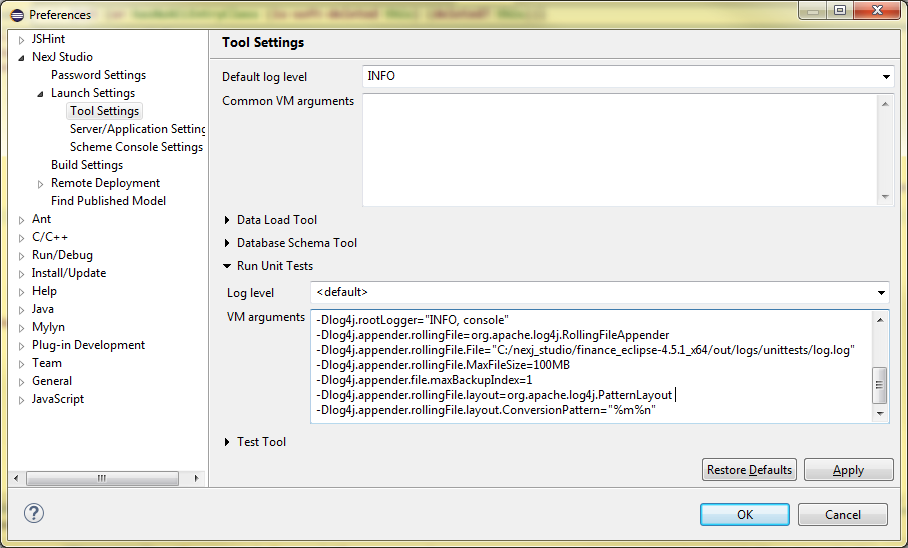
However, neither of these will retain the clone information, which can only be obtained from the logs. You can save the logs to a file to prevent information from being lost when the console rolls over by using the following as VM arguments (changing the file path and conversion pattern as needed):
|
1 2 3 4 5 6 7 |
-Dlog4j.rootLogger="INFO, console, rollingFile" -Dlog4j.appender.rollingFile=org.apache.log4j.RollingFileAppender -Dlog4j.appender.rollingFile.File="C:/nexj_studio/finance_eclipse-4.5.1_x64/out/logs/log.log" -Dlog4j.appender.rollingFile.MaxFileSize=100MB -Dlog4j.appender.file.maxBackupIndex=1 -Dlog4j.appender.rollingFile.layout=org.apache.log4j.PatternLayout -Dlog4j.appender.rollingFile.layout.ConversionPattern="; %d{HH:mm:ss.SSS zzz} %-5p [%t] [%c] %m%n" |
 Login
Login Register
 Contact